AI agent Hands-On Lab
From Zero to a Custom Research & Analysis Agent with Google's ADK
Introduction
Welcome to this hands-on session on building AI agents. Today, we will move beyond theory and dive directly into the practical aspects of running, inspecting, and customizing a production-ready AI agent.
Our Tools
We will be using two key pieces of technology:
Google’s Agent Development Kit (ADK): An open-source Python framework designed for building and deploying sophisticated, multi-agent systems. It provides the essential plumbing for state management, orchestration, and tool integration, allowing us to focus on the agent’s logic.
The Gemini Fullstack Agent Sample: A production-ready blueprint for building a sophisticated, full-stack research agent powered by Gemini. It includes a React/Next.js frontend and an ADK-powered FastAPI backend.
Our Goal
The official README.md for this sample provides an excellent overview of its architecture and features. You can find the complete source code and original documentation at the following repository: https://
In this lab, we will go a step further. Our focus is on the customization process. We will walk through a detailed, user-friendly setup and then extend the agent’s capabilities by adding a brand-new code_execution_agent, transforming it from a pure researcher into a powerful research and analysis tool.
Let’s get started.
Part 1: Setup and Initial Run
This section provides a detailed, step-by-step guide to getting the agent running on your local machine. We’ll use screenshots to make each step as clear as possible.
Prerequisites
Ensure you have the following software installed on your system:
Google Cloud SDK (
gcloud): The command-line tool for interacting with Google Cloud.Python: Version 3.10 or newer.
uv: A fast Python package installer.
Git: For cloning the source code repository.
Node.js: Version 18 or newer.
Step 1: Install Google Cloud SDK
If you don’t have the gcloud CLI installed, follow the instructions for your operating system.
Installing on macOS with Homebrew
For macOS users, the simplest method is to use Homebrew, a popular package manager.
brew install --cask gcloud-cliFor other operating systems, please refer to the Install the gcloud CLI.
Step 2: Configure Your Google Cloud Project
The agent uses Google Cloud services (specifically Vertex AI) for its reasoning capabilities.
Create or Select a Project: Go to the Google Cloud Console and either create a new project or select an existing one. Make sure billing is enabled for the project.

Figure 1:Your Project ID can be found in the Project info card on the Google Cloud Console dashboard.
Authenticate Your Local Environment: Run the following command in your terminal, replacing
YOUR_PROJECT_IDwith the ID from the console. The first command will open a browser window for you to log in and grant permissions.# Replace YOUR_PROJECT_ID with your actual Google Cloud project ID export PROJECT_ID="YOUR_PROJECT_ID" gcloud auth application-default login gcloud config set project $PROJECT_IDEnable Required APIs: Run the following commands. This only needs to be done once per project.
gcloud services enable aiplatform.googleapis.com run.googleapis.com cloudbuild.googleapis.com --project=$PROJECT_ID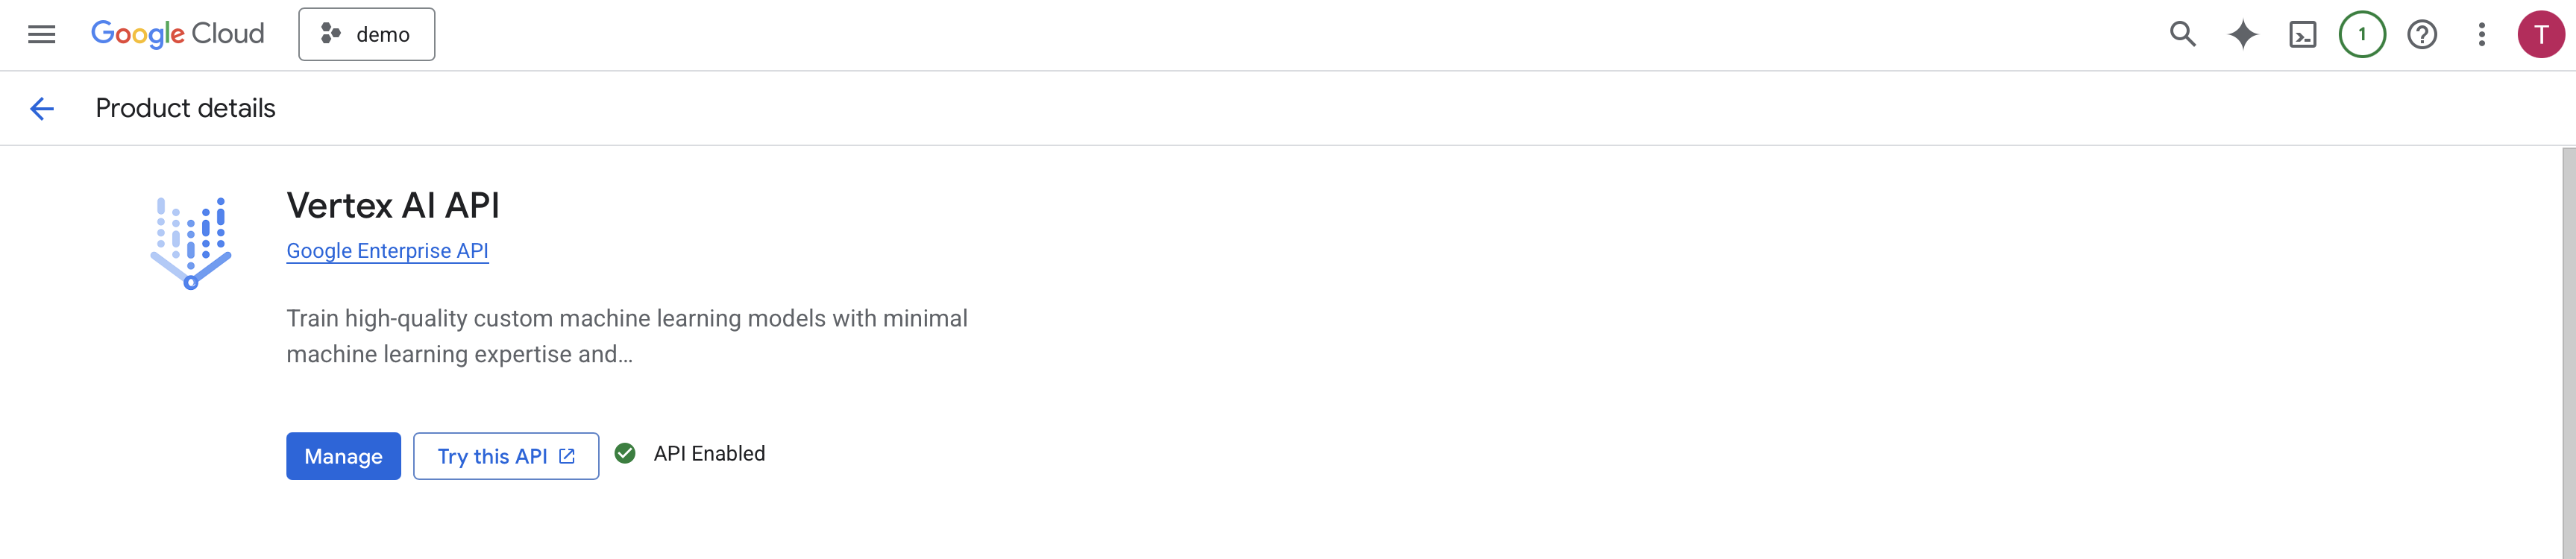
Figure 2:The Vertex AI API is enabled.
Step 3: Clone the Repository and Install Dependencies
Create Project from Template: This command uses the Agent Starter Pack to create a new directory (
my-fullstack-agent) with all the necessary code.# Create and activate a virtual environment python -m venv .venv && source .venv/bin/activate # On Windows: .venv\Scripts\activate # Install the starter pack and create your project pip install --upgrade agent-starter-pack agent-starter-pack create my-fullstack-agent -a adk@gemini-fullstackAlternative: Using uvIf you have uv installed, you can create and set up your project with a single command:
uvx agent-starter-pack create my-fullstack-agent -a adk@gemini-fullstackThis command handles creating the project without needing to pre-install the package into a virtual environment.
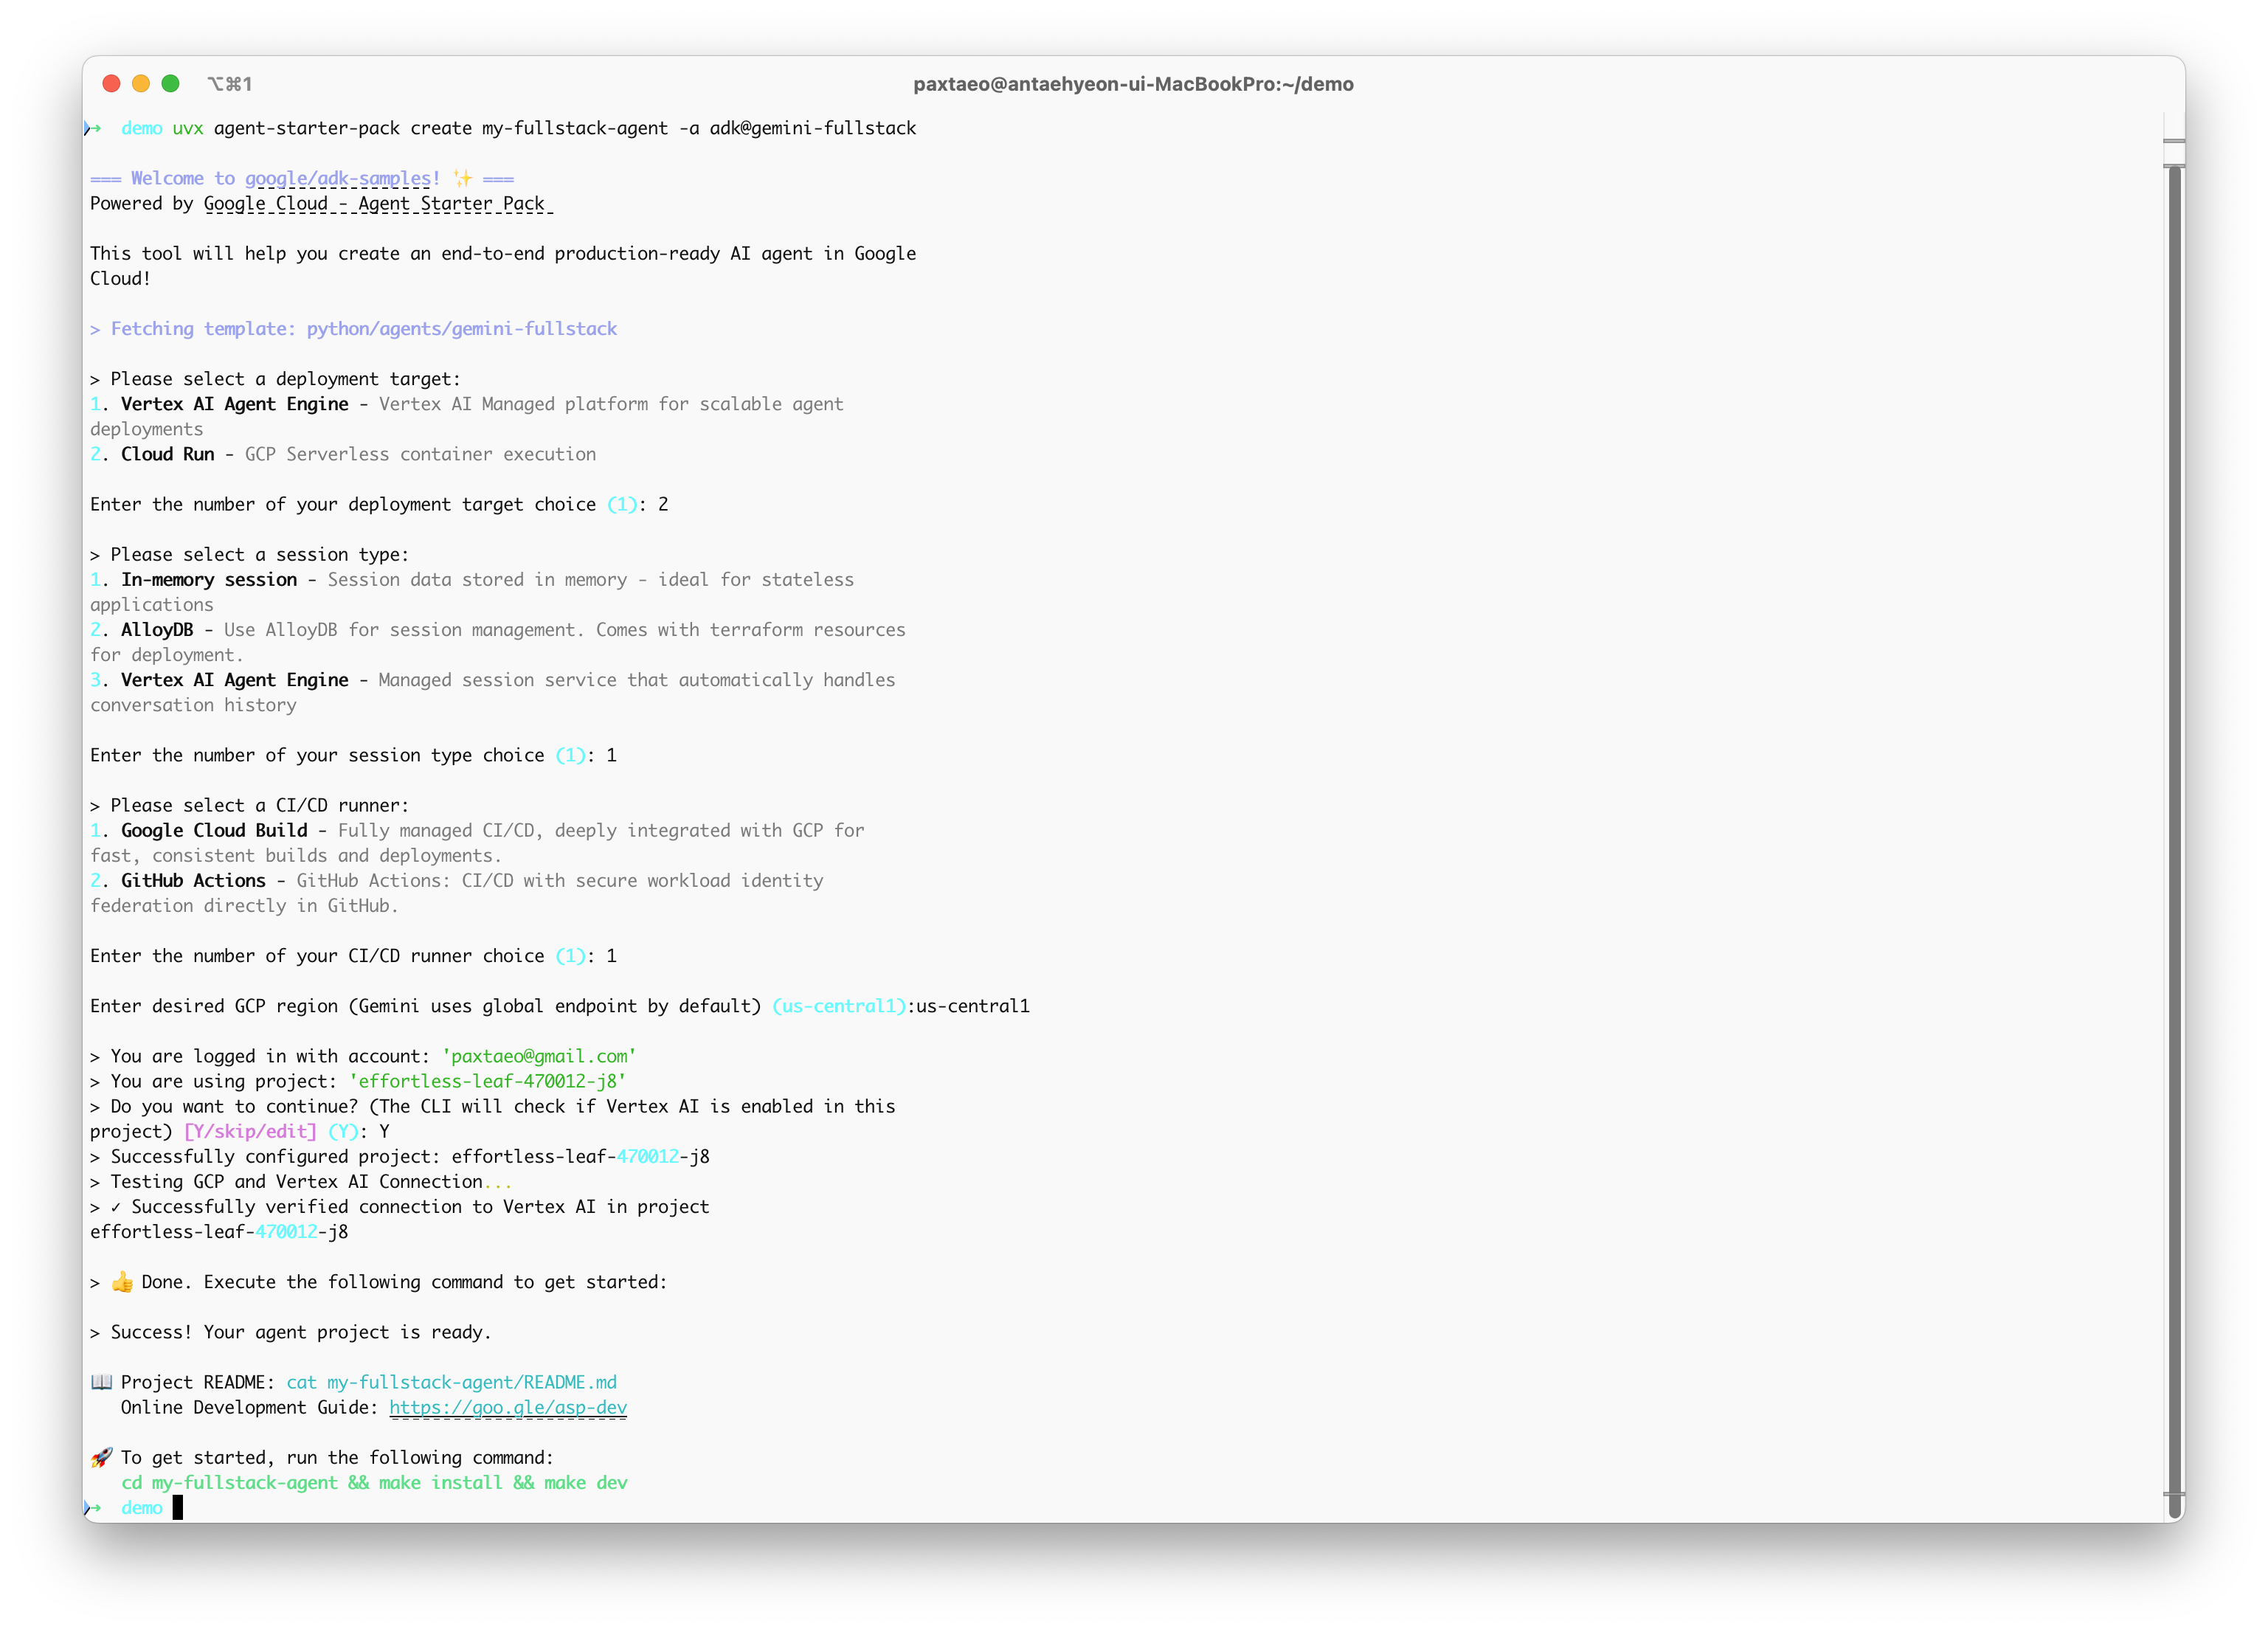
Figure 3:Select a deployment option as you create your agent project.
Install & Run: Navigate into your newly created project folder, then install dependencies and start the servers.
cd my-fullstack-agent && make install && make devYour agent is now running at
http://localhost:5173/app/.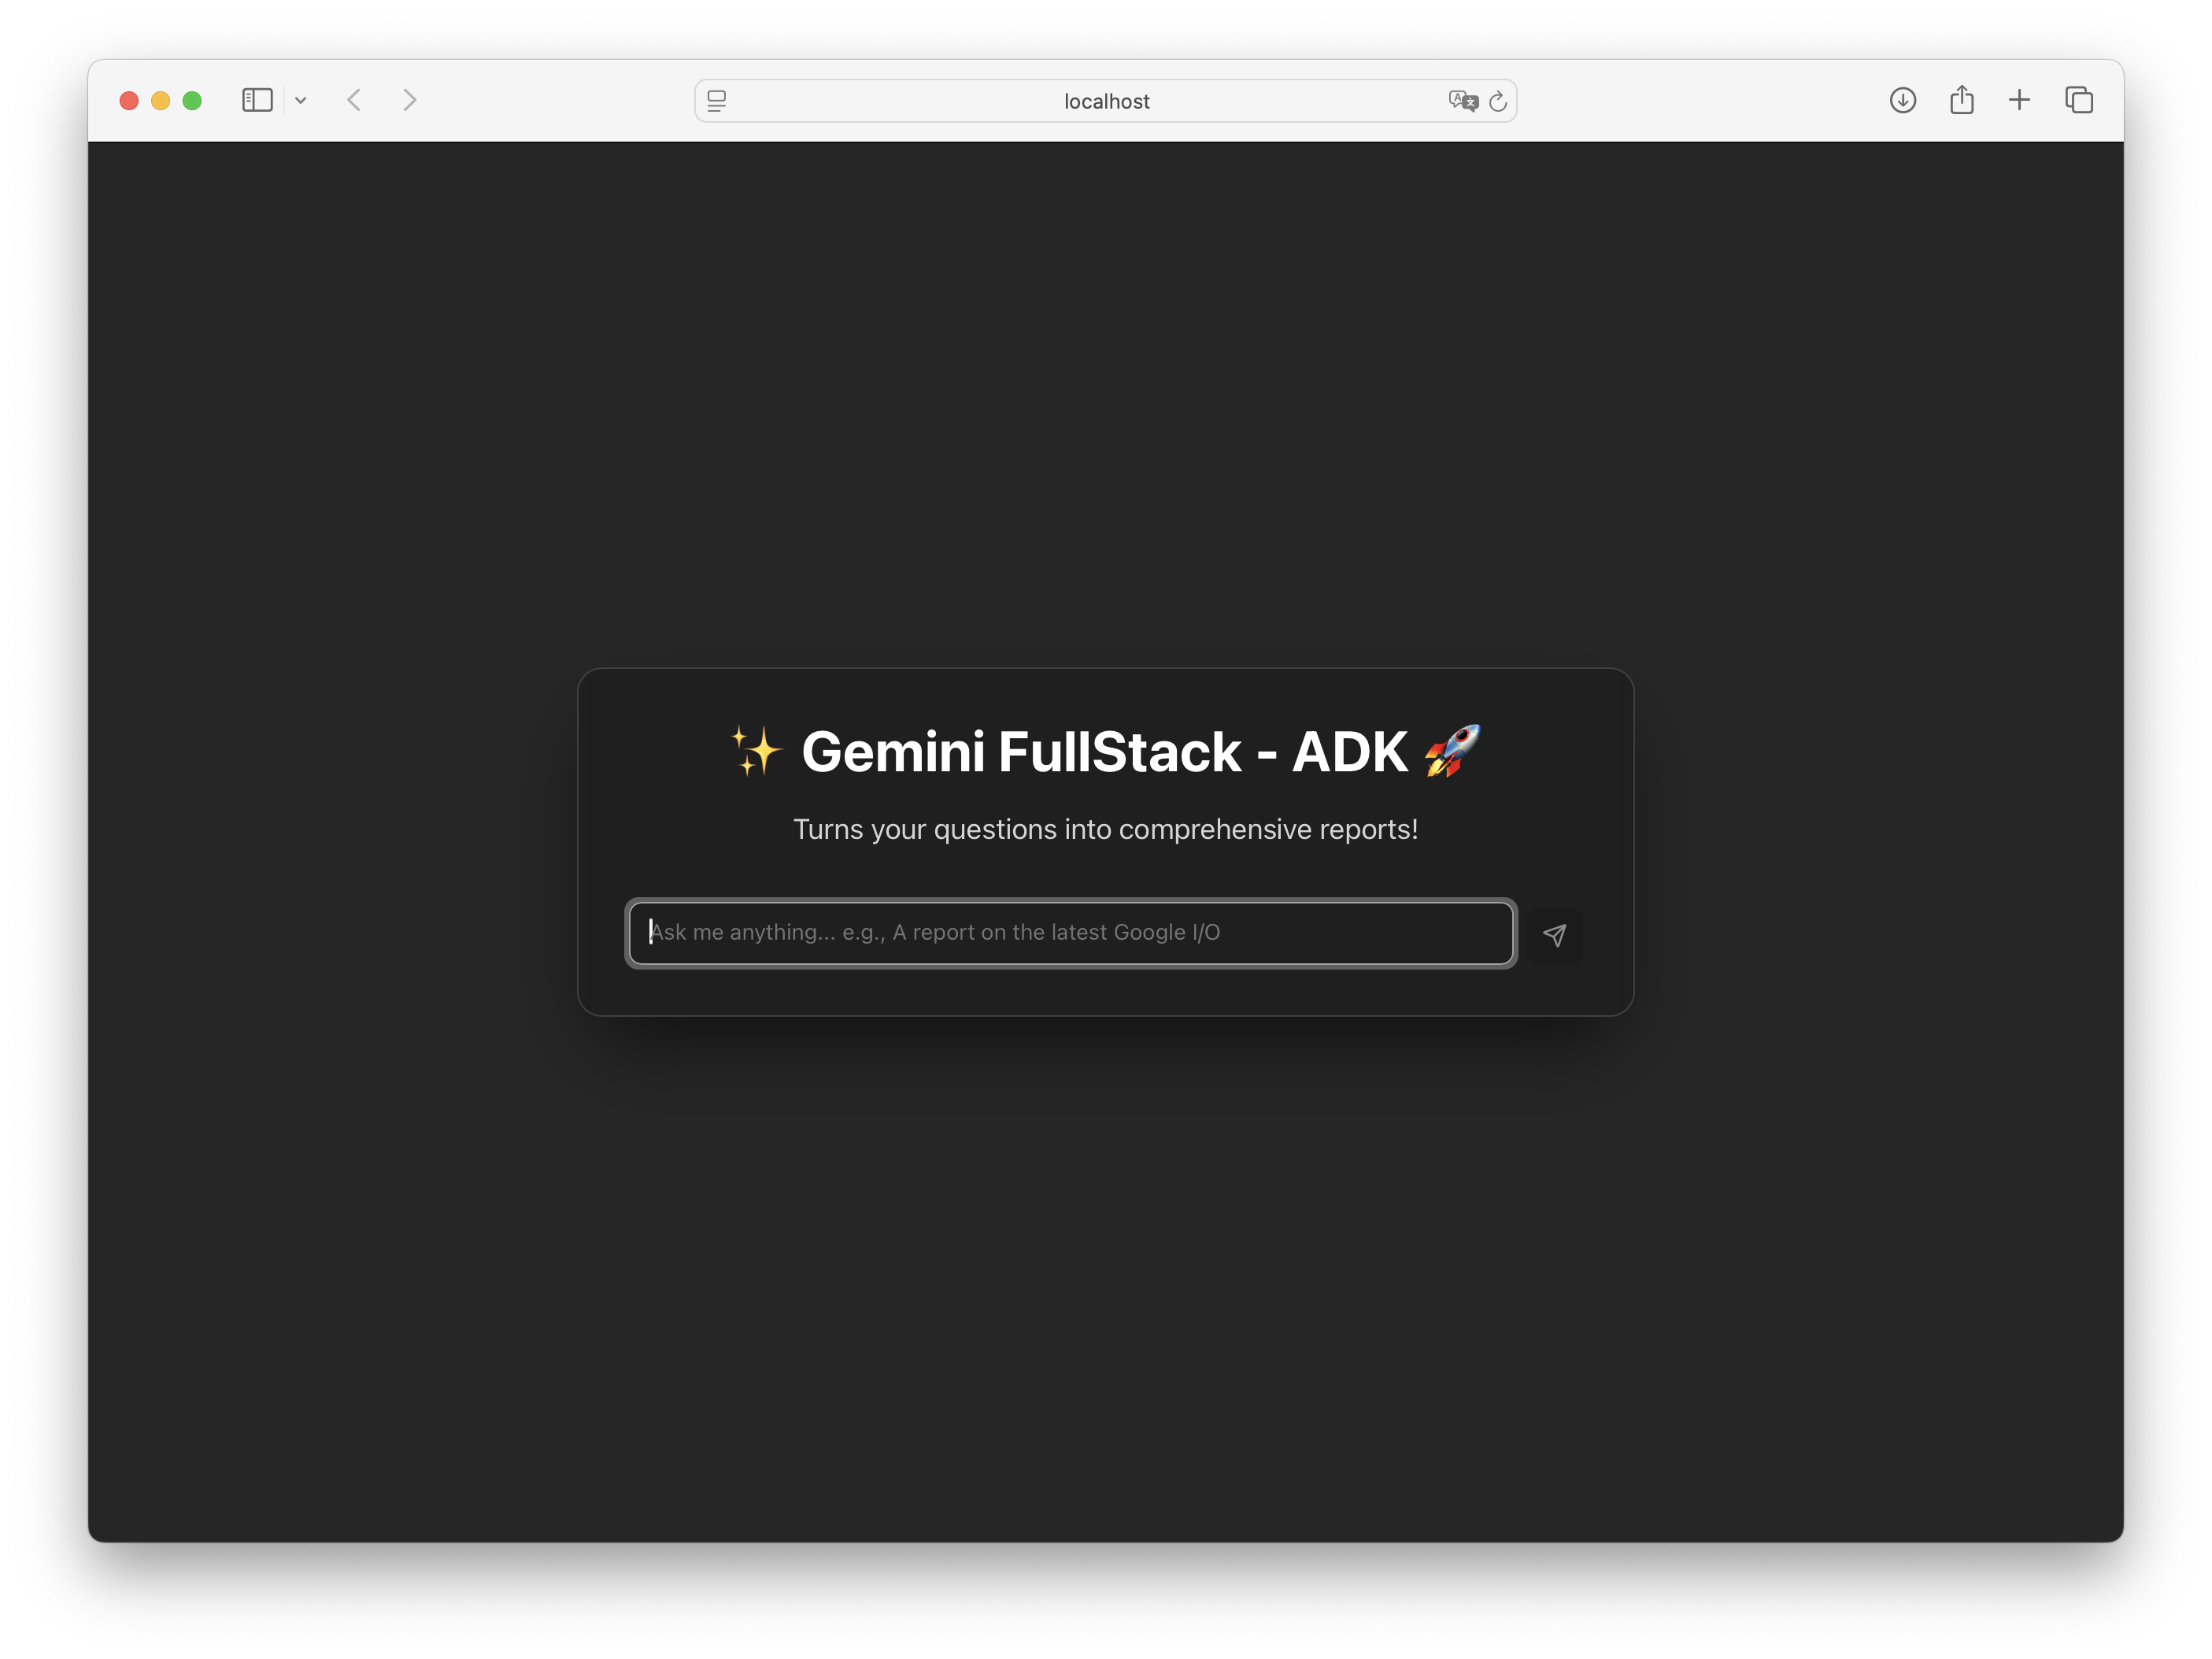
Figure 4:The running Gemini Fullstack agent application.
Part 2: Customization: Adding a Code Execution Agent
The base agent is a powerful researcher. Now, we will extend its capabilities to perform quantitative analysis by adding a new specialist agent: a code_execution_agent. This demonstrates the modular, multi-agent design philosophy of ADK.
Step 1: Define Utility Functions for File Handling
First, we will write utility functions to pass the CSV files for analysis into the sandboxed code execution environment.
Set the directory where your CSV files will be stored in the app/config.py file.
15 16 17 18 19 20 21 22 23 24 25 26 27 28 29 30 31 32 33 34 35 36 37 38 39 40 41 42 43 44 45 46 47 48import os from dataclasses import dataclass from pathlib import Path from typing import Final import google.auth # To use AI Studio credentials: # 1. Create a .env file in the /app directory with: # GOOGLE_GENAI_USE_VERTEXAI=FALSE # GOOGLE_API_KEY=PASTE_YOUR_ACTUAL_API_KEY_HERE # 2. This will override the default Vertex AI configuration _, project_id = google.auth.default() os.environ.setdefault("GOOGLE_CLOUD_PROJECT", project_id) os.environ.setdefault("GOOGLE_CLOUD_LOCATION", "global") os.environ.setdefault("GOOGLE_GENAI_USE_VERTEXAI", "True") @dataclass class ResearchConfiguration: """Configuration for research-related models and parameters. Attributes: critic_model (str): Model for evaluation tasks. worker_model (str): Model for working/generation tasks. max_search_iterations (int): Maximum search iterations allowed. """ critic_model: str = "gemini-2.5-pro" worker_model: str = "gemini-2.5-flash" max_search_iterations: int = 5 data_dir: Final[Path] = Path(__file__).parent / "data" config = ResearchConfiguration()
In app/agent.py, define the utility functions to prepare the CSV files to be passed to the Vertex Code Interpreter Extension.
import os
import base64
from pathlib import Path
from google.adk.code_executors import CodeExecutorContext, VertexAiCodeExecutor
from google.adk.code_executors.code_execution_utils import File

def _csv_file_to_adk_file(path: Path) -> File:
    """Convert a CSV file to an ADK File object."""
    with path.open("rb") as fp:
        encoded = base64.b64encode(fp.read()).decode("utf-8")
    return File(
        name=path.name,
        content=encoded,
        mime_type="text/csv",
    )

def attach_csv_files_callback(callback_context: CallbackContext) -> None:
    """Attach CSV files in data/ to the code-executor session."""
    if not config.data_dir.exists():
        logging.warning("[attach_csv_files_callback] %s not found - no files attached", config.data_dir)
        return

    csv_files: list[File] = [
        _csv_file_to_adk_file(p)
        for p in config.data_dir.iterdir()
        if p.is_file() and p.suffix.lower() == ".csv"
    ]

    if not csv_files:
        logging.info("[attach_csv_files_callback] data/ contains no *.csv files")
        return

    exec_ctx = CodeExecutorContext(callback_context.state)
    exec_ctx.add_input_files(csv_files)
    callback_context.state.update(exec_ctx.get_state_delta())

    logging.info(
        f"[attach_csv_files_callback] Registered {len(csv_files)} CSV file(s): {', '.join(f.name for f in csv_files)}",
    )
Step 2: Create the Code Execution Agent and Pipeline
Similar to the existing research_pipeline, we will construct a plan_generator and a pipeline specifically for code execution. Through the instructions, we can directly configure the code framework for comparing predictive models.
- LlmAgent
- The
LlmAgentis a core component in ADK, acting as the “thinking” part of your application. It leverages the power of a LLM for reasoning, understanding natural language, making decisions, generating responses, and interacting with tools. - SequentialAgent
- The
SequentialAgentis a workflow agent that executes its sub-agents in the order they are specified in the list. Use theSequentialAgentwhen you want the execution to occur in a fixed, strict order.
code_plan_generator = LlmAgent(
    model=config.worker_model,
    name="code_plan_generator",
    description="Creates a step-by-step plan for data-science / ML code execution tasks.",
    instruction=f"""
    You are a *code analysis planning assistant*.
    When the user’s request requires running Python (e.g., training or comparing models, data preprocessing, visualization):

    CODE PLAN(SO FAR):
    {{ research_plan? }}

    1. Draft a concise **CODE PLAN** consisting of 3-7 numbered steps.
    2. Each step **must** begin with an action verb (e.g., *Load data*, *Impute missing values*, *Train KNN*).
    3. Always propose:
        - default **imputation** strategy (mean / median for numeric)
        - **train : test split** → 80:20
        - three baseline models *knn*, *logit/linear regression*, *random forest*
    4. Keep the plan flexible — these defaults may be edited by the user.
    5. *Do not* execute any code; just output the plan.

    Current date: {datetime.datetime.now().strftime("%Y-%m-%d")}
    """,
)

code_executor_tool_agent = LlmAgent(
    model=config.worker_model,
    name="code_executor_tool",
    description="Executes arbitrary Python code snippets in a sandboxed Vertex AI Code Interpreter session.",
    instruction="Run the provided Python code and return stdout, stderr, and any generated files.",
    code_executor=VertexAiCodeExecutor(
        resource_name=os.environ.get("CODE_INTERPRETER_ID"),
        optimize_data_file=True,
        stateful=False,
    ),
    before_agent_callback=attach_csv_files_callback,
)

code_result_summariser = LlmAgent(
    model=config.critic_model,
    name="code_result_summariser",
    description="Builds a detailed, reader-friendly Markdown report that includes the executed code, raw output, key metrics, interpretation, and download links for any generated files.",
    instruction="""
    You will receive two objects in the session state **exactly once**:
    - `executed_code` - *string* containing the Python source that ran.
    - `execution_output` - *string* containing stdout / stderr returned by the code-executor.

    **YOUR TASK**
    Produce a single Markdown report with **all** of the following sections ― in the order shown:

    1. **Executed Code**
    ```python
    <insert executed_code here>
    ```

    2. **Raw Output**
    ```markdown
    <insert execution_output here>
    ```

    3. **Key Metrics**
    - Derive bullet-point metrics (accuracy, RMSE, feature importance) by scanning the raw output.
    - If no obvious metric is present, state “No explicit metric found.”

    4. **Interpretation**
    A short paragraph (3-5 sentences) **explaining what the results mean** for a non-expert reader.
    Mention which model performed best *and* any notable caveats.

    **Formatting rules**
    - Do *not* wrap the report in triple back-ticks; each section already contains the necessary fencing.
    - Keep the tone informative and concise.

    Return the completed Markdown as plain text in your `assistant` message body.
    """,
    include_contents="none",
    output_key="code_execution_report",
)

code_pipeline = SequentialAgent(
    name="code_pipeline",
    description="Runs the user-approved code plan and packages the results.",
    sub_agents=[
        code_executor_tool_agent,
        code_result_summariser,
    ],
)
Step 3: Integrate the Agent into the Orchestrator
Finally, we integrate our new specialist into the main agent team. Update the root_agent’s instructions to teach it how and when to delegate. This is the most critical step, as it modifies the core logic of the orchestrator.
interactive_planner_agent = LlmAgent(
    model=config.worker_model,
    name="interactive_planner_agent",
    description="Top-level assistant that decides between quick answer, search-based plan, or code-based plan.",
    instruction=f"""
    You are the primary assistant.

    Workflow:
    **Step 0 — Quick answer**
    - If the user's question is *trivial* (e.g., "What year is it?", "2+2?"), answer directly **without** any tools.

    **Step 1 — Plan**
    - If the request requires **web research**, call `search_plan_generator`.
    - If it requires **running code / data analysis**, call `code_plan_generator`.
    - Present the generated PLAN to the user for approval.

    **Step 2 — Refine**
    - Incorporate user feedback until they explicitly approve ("looks good", "run it", "LGTM", etc.).

    **Step 3 — Execute**
    - After plan approval:
        - If the plan came from `search_plan_generator`, delegate to `research_pipeline`.
        - If the plan came from `code_plan_generator`, delegate to `code_pipeline`.

    You MUST never answer substantive queries directly (except trivial quick answers) without first following the Plan → Execute pattern.

    Current date: {datetime.datetime.now().strftime("%Y-%m-%d")}
    """,
    sub_agents=[
        research_pipeline,   # search / web
        code_pipeline,       # code execution
    ],
    tools=[
        AgentTool(plan_generator),
        AgentTool(code_plan_generator),
    ],
    output_key="research_plan",
)
Step 4: Testing the New Capability
With the backend logic updated, you can now test the new agent workflow. The ADK includes a convenient, lightweight development UI called the “Playground” that allows you to interact with your agent backend directly, without needing to run the full React frontend. This is ideal for quickly testing and debugging agent logic.
To start the ADK Playground, run the following command in your terminal:
make playgroundOnce it’s running, access the Playground in your browser at http://localhost:8501. You can now chat with your agent and verify that it correctly generates and executes a code-based plan when given a data analysis prompt.
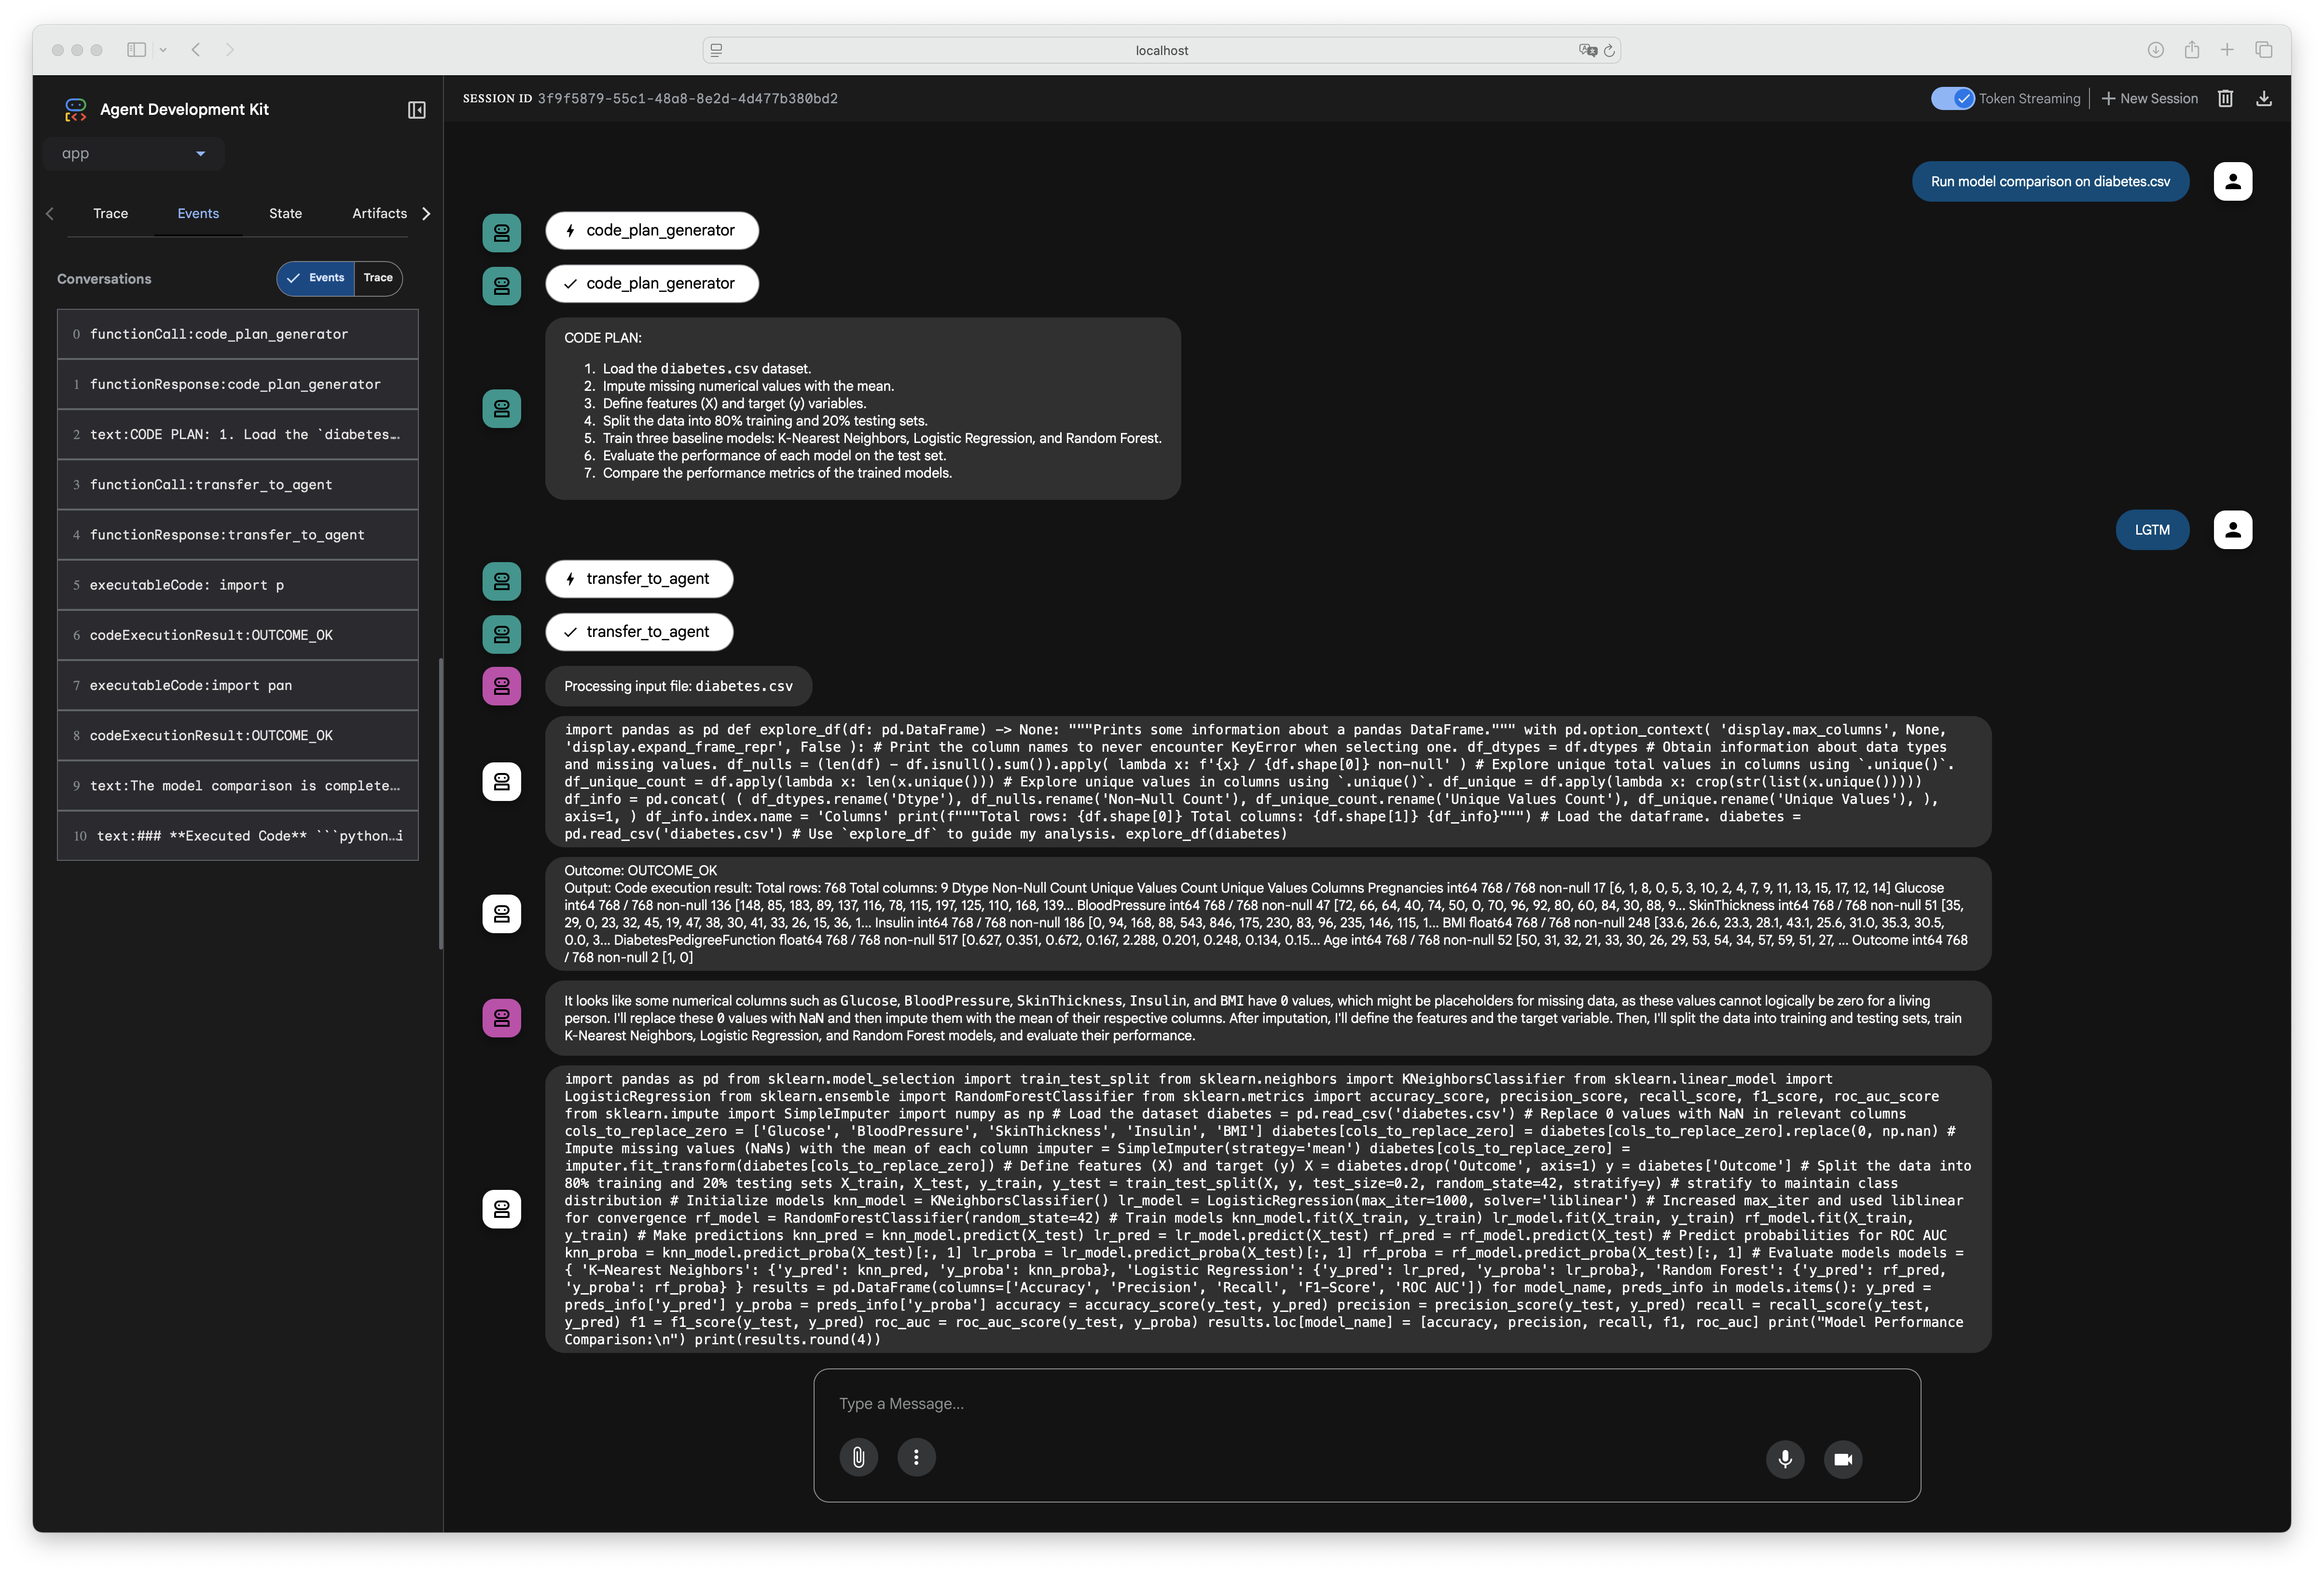
Figure 5:The ADK Playground UI allows you to chat directly with your agent backend.
(Optional) Step 5: Extend and Test the Frontend
While the Playground is excellent for backend validation, to see the results in the full-featured web application shown in the initial setup, the frontend code must be updated to render the new code_execution_report.
Summary of Frontend Code Additions
The key changes involve updating the AgentResponse interface to recognize the new code_execution_report and modifying the Server-Sent Events (SSE) handler to process and display this new type of message.
21 22 23 24 25 26 27 28 29 30 31 32 33 34 35 36interface AgentResponse { content: AgentMessage; usageMetadata: { candidatesTokenCount: number; promptTokenCount: number; totalTokenCount: number; }; author: string; actions: { stateDelta: { research_plan?: string; final_report_with_citations?: boolean; code_execution_report?: string; }; }; }
121 122 123 124 125 126 127 128 129 130 131 132 133 134 135 136 137 138 139 140 141 142 143 144 145 146 147 148 149 150 151 152 153 154 155 156 157 158 159 160 161 162 163 164 165 166 167 168 169 170 171 172 173 174 175 176 177 178 179 180 181 182 183 184 185 186 187 188 189 190 191 192 193 194 195 196 197 198 199 200 201 202 203 204// Function to extract text and metadata from SSE data const extractDataFromSSE = (data: string) => { try { const parsed = JSON.parse(data); console.log('[SSE PARSED EVENT]:', JSON.stringify(parsed, null, 2)); // DEBUG: Log parsed event let textParts: string[] = []; let agent = ''; let finalReportWithCitations = undefined; let functionCall = null; let functionResponse = null; let sources = null; let codeReport = null; // Check if content.parts exists and has text if (parsed.content && parsed.content.parts) { textParts = parsed.content.parts .filter((part: any) => part.text) .map((part: any) => part.text); // Check for function calls const functionCallPart = parsed.content.parts.find((part: any) => part.functionCall); if (functionCallPart) { functionCall = functionCallPart.functionCall; } // Check for function responses const functionResponsePart = parsed.content.parts.find((part: any) => part.functionResponse); if (functionResponsePart) { functionResponse = functionResponsePart.functionResponse; } } // Extract agent information if (parsed.author) { agent = parsed.author; console.log('[SSE EXTRACT] Agent:', agent); // DEBUG: Log agent } if ( parsed.actions && parsed.actions.stateDelta && parsed.actions.stateDelta.final_report_with_citations ) { finalReportWithCitations = parsed.actions.stateDelta.final_report_with_citations; } if ( parsed.actions && parsed.actions.stateDelta && parsed.actions.stateDelta.code_execution_report ) { codeReport = parsed.actions.stateDelta.code_execution_report; console.log('[SSE EXTRACT] Code execution report found:', codeReport); // DEBUG } // Extract website count from research agents let sourceCount = 0; if ((parsed.author === 'section_researcher' || parsed.author === 'enhanced_search_executor')) { console.log('[SSE EXTRACT] Relevant agent for source count:', parsed.author); // DEBUG if (parsed.actions?.stateDelta?.url_to_short_id) { console.log('[SSE EXTRACT] url_to_short_id found:', parsed.actions.stateDelta.url_to_short_id); // DEBUG sourceCount = Object.keys(parsed.actions.stateDelta.url_to_short_id).length; console.log('[SSE EXTRACT] Calculated sourceCount:', sourceCount); // DEBUG } else { console.log('[SSE EXTRACT] url_to_short_id NOT found for agent:', parsed.author); // DEBUG } } // Extract sources if available if (parsed.actions?.stateDelta?.sources) { sources = parsed.actions.stateDelta.sources; console.log('[SSE EXTRACT] Sources found:', sources); // DEBUG } return { textParts, agent, finalReportWithCitations, functionCall, functionResponse, sourceCount, sources, codeReport }; } catch (error) { // Log the error and a truncated version of the problematic data for easier debugging. const truncatedData = data.length > 200 ? data.substring(0, 200) + "..." : data; console.error('Error parsing SSE data. Raw data (truncated): "', truncatedData, '". Error details:', error); return { textParts: [], agent: '', finalReportWithCitations: undefined, functionCall: null, functionResponse: null, sourceCount: 0, sources: null, codeReport: null }; } };
206 207 208 209 210 211 212 213 214 215 216 217 218 219 220 221 222 223 224 225 226 227 228 229 230 231 232 233 234 235 236 237 238 239// Define getEventTitle here or ensure it's in scope from where it's used const getEventTitle = (agentName: string): string => { switch (agentName) { case "research_plan_generator": return "Planning Research Strategy"; case "section_planner": return "Structuring Report Outline"; case "section_researcher": return "Initial Web Research"; case "research_evaluator": return "Evaluating Research Quality"; case "EscalationChecker": return "Quality Assessment"; case "enhanced_search_executor": return "Enhanced Web Research"; case "research_pipeline": return "Executing Research Pipeline"; case "iterative_refinement_loop": return "Refining Research"; case "code_plan_generator": return "Planning Code Analysis"; case "code_executor_tool": return "Running Code"; case "code_result_summariser": return "Summarising Results"; case "code_pipeline": return "Executing Code Pipeline"; case "interactive_planner_agent": case "root_agent": return "Interactive Planning"; default: return `Processing (${agentName || 'Unknown Agent'})`; } };
241 242 243 244 245 246 247 248 249 250 251 252 253 254 255 256 257 258 259 260 261 262 263 264 265 266 267 268 269 270 271 272 273 274 275 276 277 278 279 280 281 282 283 284 285 286 287 288 289 290 291 292 293 294 295 296 297 298 299 300 301 302 303 304 305 306 307 308 309 310const processSseEventData = (jsonData: string, aiMessageId: string) => { const { textParts, agent, finalReportWithCitations, functionCall, functionResponse, sourceCount, sources, codeReport } = extractDataFromSSE(jsonData); if (sourceCount > 0) { console.log('[SSE HANDLER] Updating websiteCount. Current sourceCount:', sourceCount); setWebsiteCount(prev => Math.max(prev, sourceCount)); } if (agent && agent !== currentAgentRef.current) { currentAgentRef.current = agent; } if (functionCall) { const functionCallTitle = `Function Call: ${functionCall.name}`; console.log('[SSE HANDLER] Adding Function Call timeline event:', functionCallTitle); setMessageEvents(prev => new Map(prev).set(aiMessageId, [...(prev.get(aiMessageId) || []), { title: functionCallTitle, data: { type: 'functionCall', name: functionCall.name, args: functionCall.args, id: functionCall.id } }])); } if (functionResponse) { const functionResponseTitle = `Function Response: ${functionResponse.name}`; console.log('[SSE HANDLER] Adding Function Response timeline event:', functionResponseTitle); setMessageEvents(prev => new Map(prev).set(aiMessageId, [...(prev.get(aiMessageId) || []), { title: functionResponseTitle, data: { type: 'functionResponse', name: functionResponse.name, response: functionResponse.response, id: functionResponse.id } }])); } if (textParts.length > 0 && agent !== "report_composer_with_citations") { if (agent !== "interactive_planner_agent") { const eventTitle = getEventTitle(agent); console.log('[SSE HANDLER] Adding Text timeline event for agent:', agent, 'Title:', eventTitle, 'Data:', textParts.join(" ")); setMessageEvents(prev => new Map(prev).set(aiMessageId, [...(prev.get(aiMessageId) || []), { title: eventTitle, data: { type: 'text', content: textParts.join(" ") } }])); } else { // interactive_planner_agent text updates the main AI message for (const text of textParts) { accumulatedTextRef.current += text + " "; setMessages(prev => prev.map(msg => msg.id === aiMessageId ? { ...msg, content: accumulatedTextRef.current.trim(), agent: currentAgentRef.current || msg.agent } : msg )); setDisplayData(accumulatedTextRef.current.trim()); } } } if (sources) { console.log('[SSE HANDLER] Adding Retrieved Sources timeline event:', sources); setMessageEvents(prev => new Map(prev).set(aiMessageId, [...(prev.get(aiMessageId) || []), { title: "Retrieved Sources", data: { type: 'sources', content: sources } }])); } if (agent === "report_composer_with_citations" && finalReportWithCitations) { const finalReportMessageId = Date.now().toString() + "_final"; setMessages(prev => [...prev, { type: "ai", content: finalReportWithCitations as string, id: finalReportMessageId, agent: currentAgentRef.current, finalReportWithCitations: true }]); setDisplayData(finalReportWithCitations as string); } if (codeReport) { const codeReportMessageId = Date.now().toString() + "_code_report"; setMessages(prev => [...prev, { type: "ai", content: codeReport, id: codeReportMessageId, agent: currentAgentRef.current, codeExecutionReport: true }]); setDisplayData(codeReport); console.log('[SSE HANDLER] Code execution report added to messages:', codeReport); } };
Assuming you have already made the necessary changes to the React components, you can test the end-to-end experience. The development server you started with make dev should have automatically reloaded after you saved your backend changes.
Return to your browser tab with the main application at http://localhost:5173/app/ and try a prompt that requires data analysis. The agent should now generate a plan, and upon your approval, execute the code and display the final, formatted report in the UI.
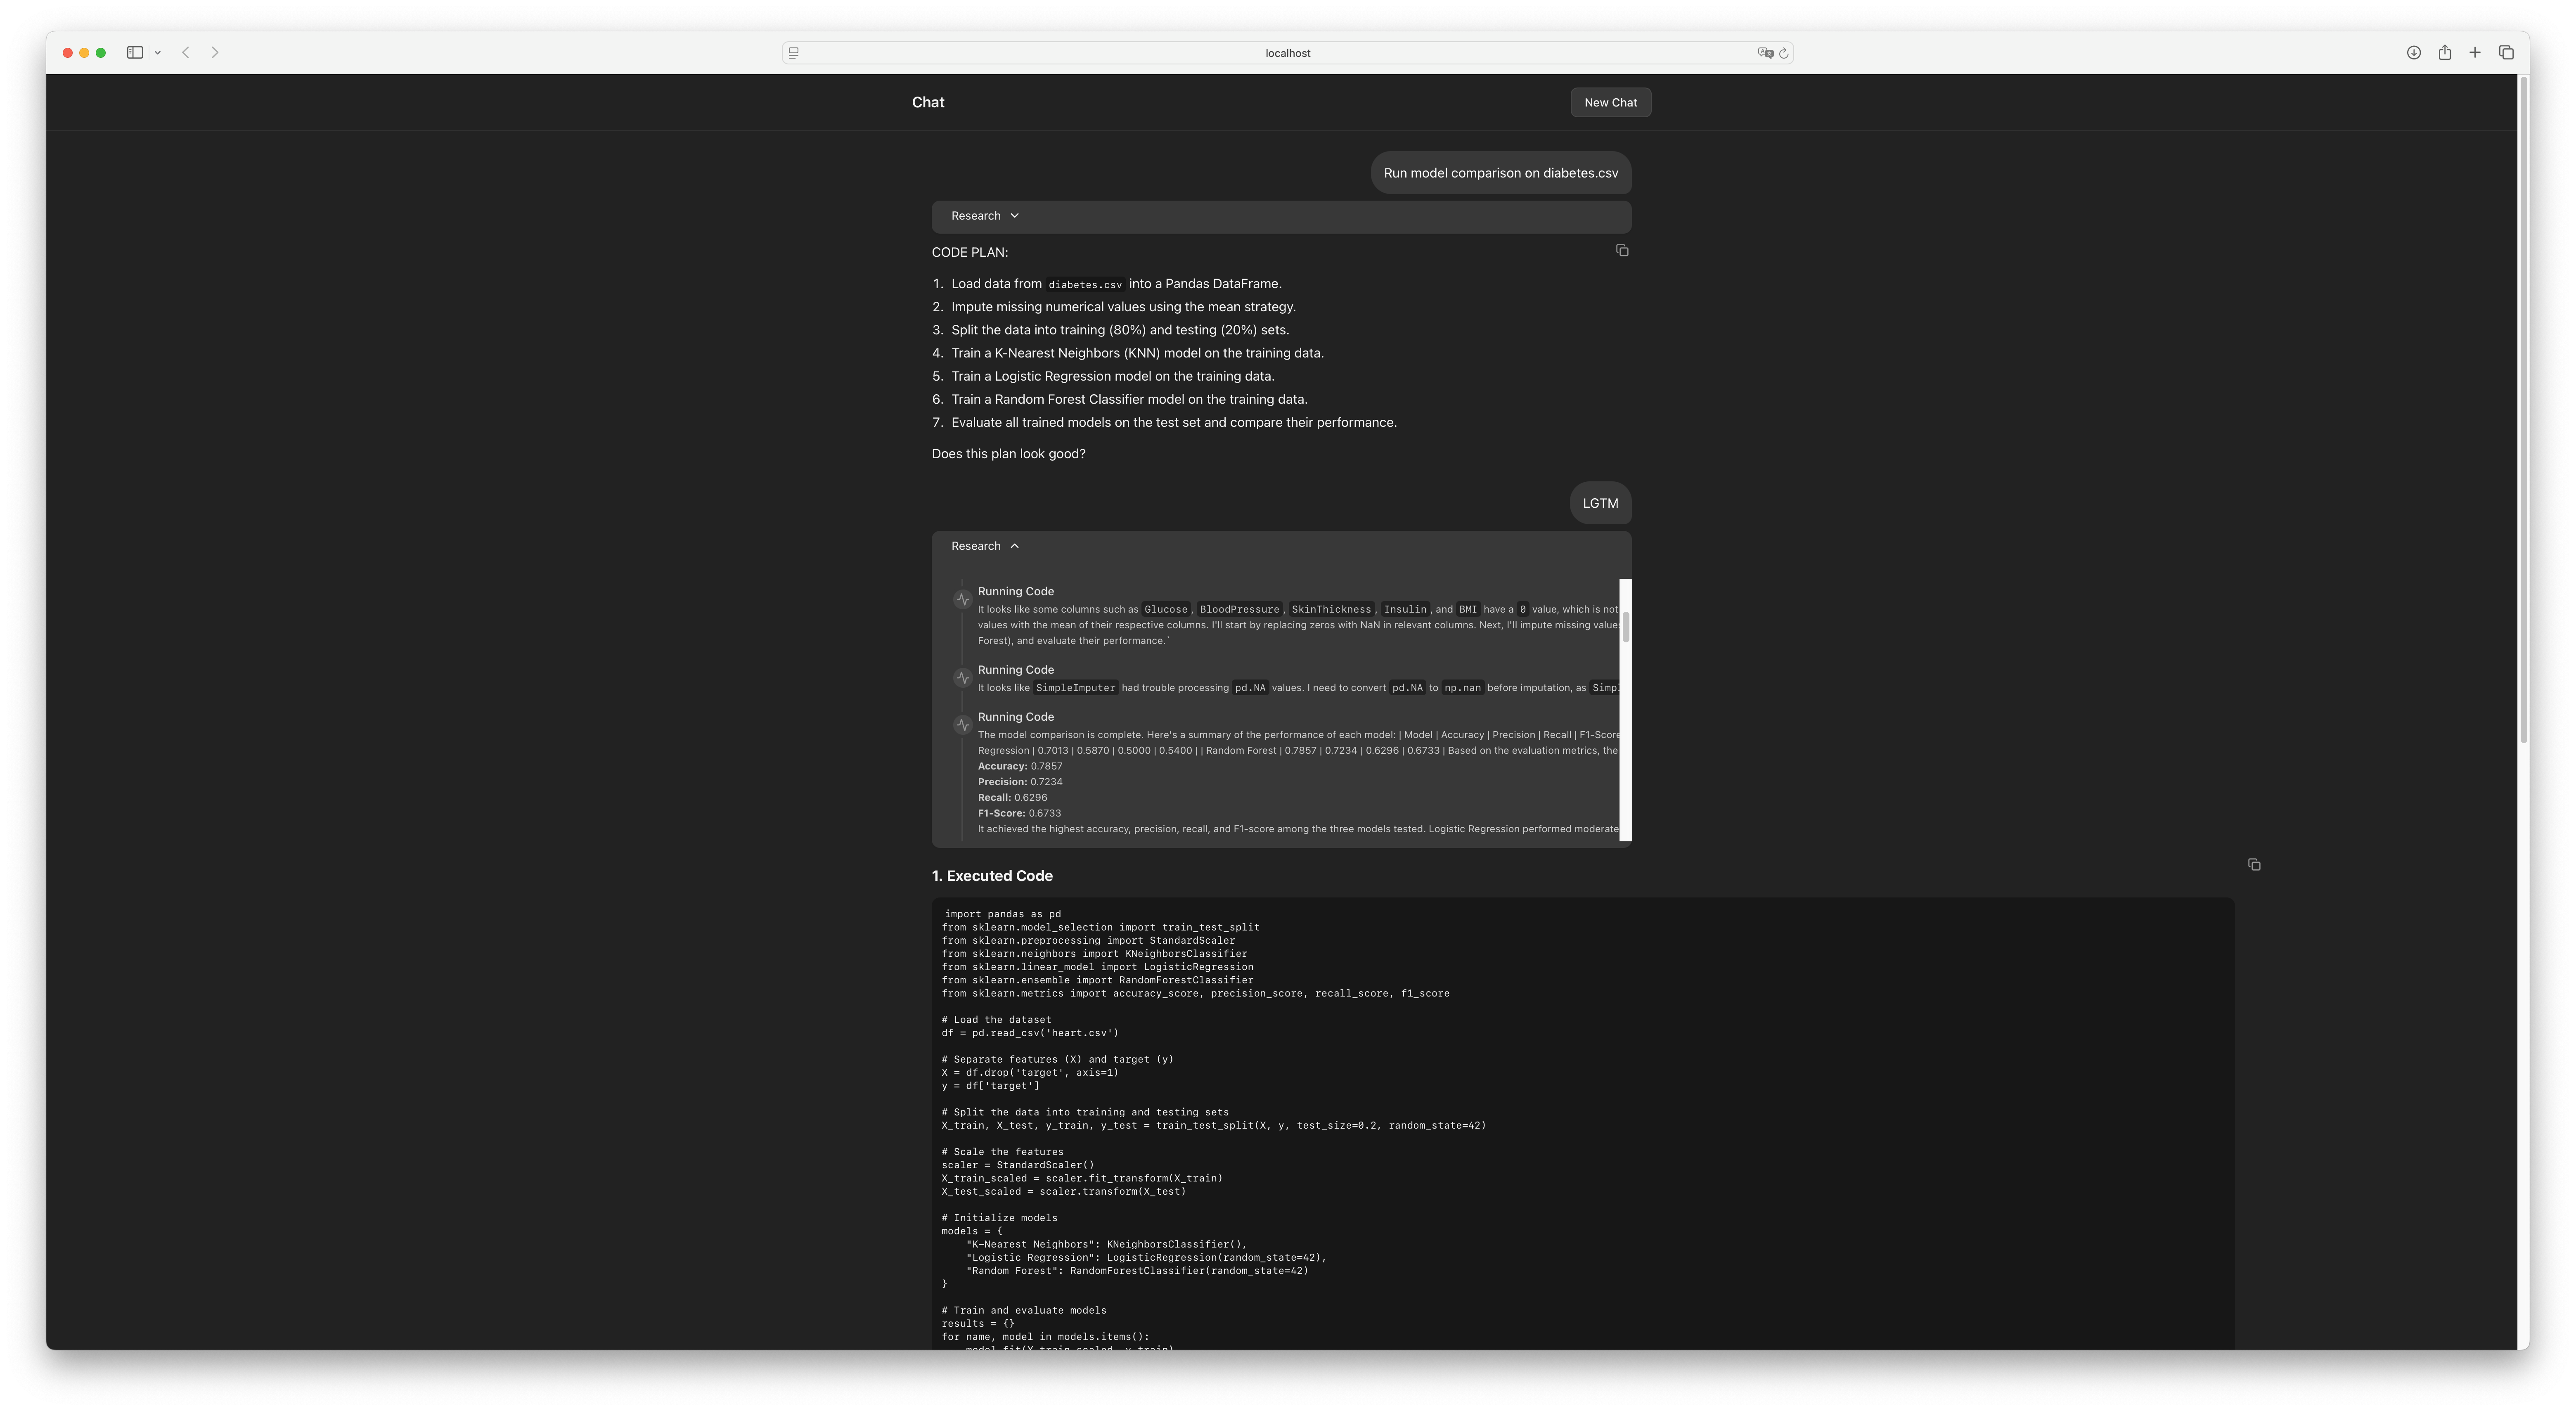
Figure 6:The agent’s plan now includes a step to generate and execute Python code for analysis.
(Optional) Part 3: Cloud Deployment
For detailed instructions on deploying with a user interface, please refer to the Agent Starter Pack Guide.
For development, modify the Dockerfile to build and run both the frontend’s development server and the backend’s API server within a single container.
Step 1: Configure the Dockerfile
Create or modify your Dockerfile to install both Python and Node.js dependencies and to launch both services concurrently.
FROM python:3.11-slim

# Install Node.js and npm
RUN apt-get update && apt-get install -y \
    nodejs \
    npm \
    curl \
    && apt-get clean \
    && rm -rf /var/lib/apt/lists/*

RUN pip install --no-cache-dir uv==0.6.12

WORKDIR /code

# Copy backend files
COPY ./pyproject.toml ./README.md ./uv.lock* ./
COPY ./app ./app

# Copy frontend files
COPY ./frontend ./frontend

# Install dependencies
RUN uv sync --frozen && npm --prefix frontend install

ARG COMMIT_SHA=""
ENV COMMIT_SHA=${COMMIT_SHA}

EXPOSE 8000 5173

# Start both backend and frontend in parallel
CMD ["sh", "-c", "ALLOW_ORIGINS='*' uv run uvicorn app.server:app --host 0.0.0.0 --port 8000 & npm --prefix frontend run dev -- --host 0.0.0.0 & wait"]
Step 2: Deploy the Combined Service
When deploying, you must instruct Cloud Run to direct traffic to the frontend’s port. Pass the PORT variable to your make command. If your frontend runs on port 5173, as in the example:
make backend PORT=5173Step 3: Manage User Access
In the Cloud Run service’s “Security” tab, change the “Authentication” setting to “Allow unauthenticated invocations” for public access. For production applications, you should configure more secure options like IAP (Identity-Aware Proxy) or IAM.
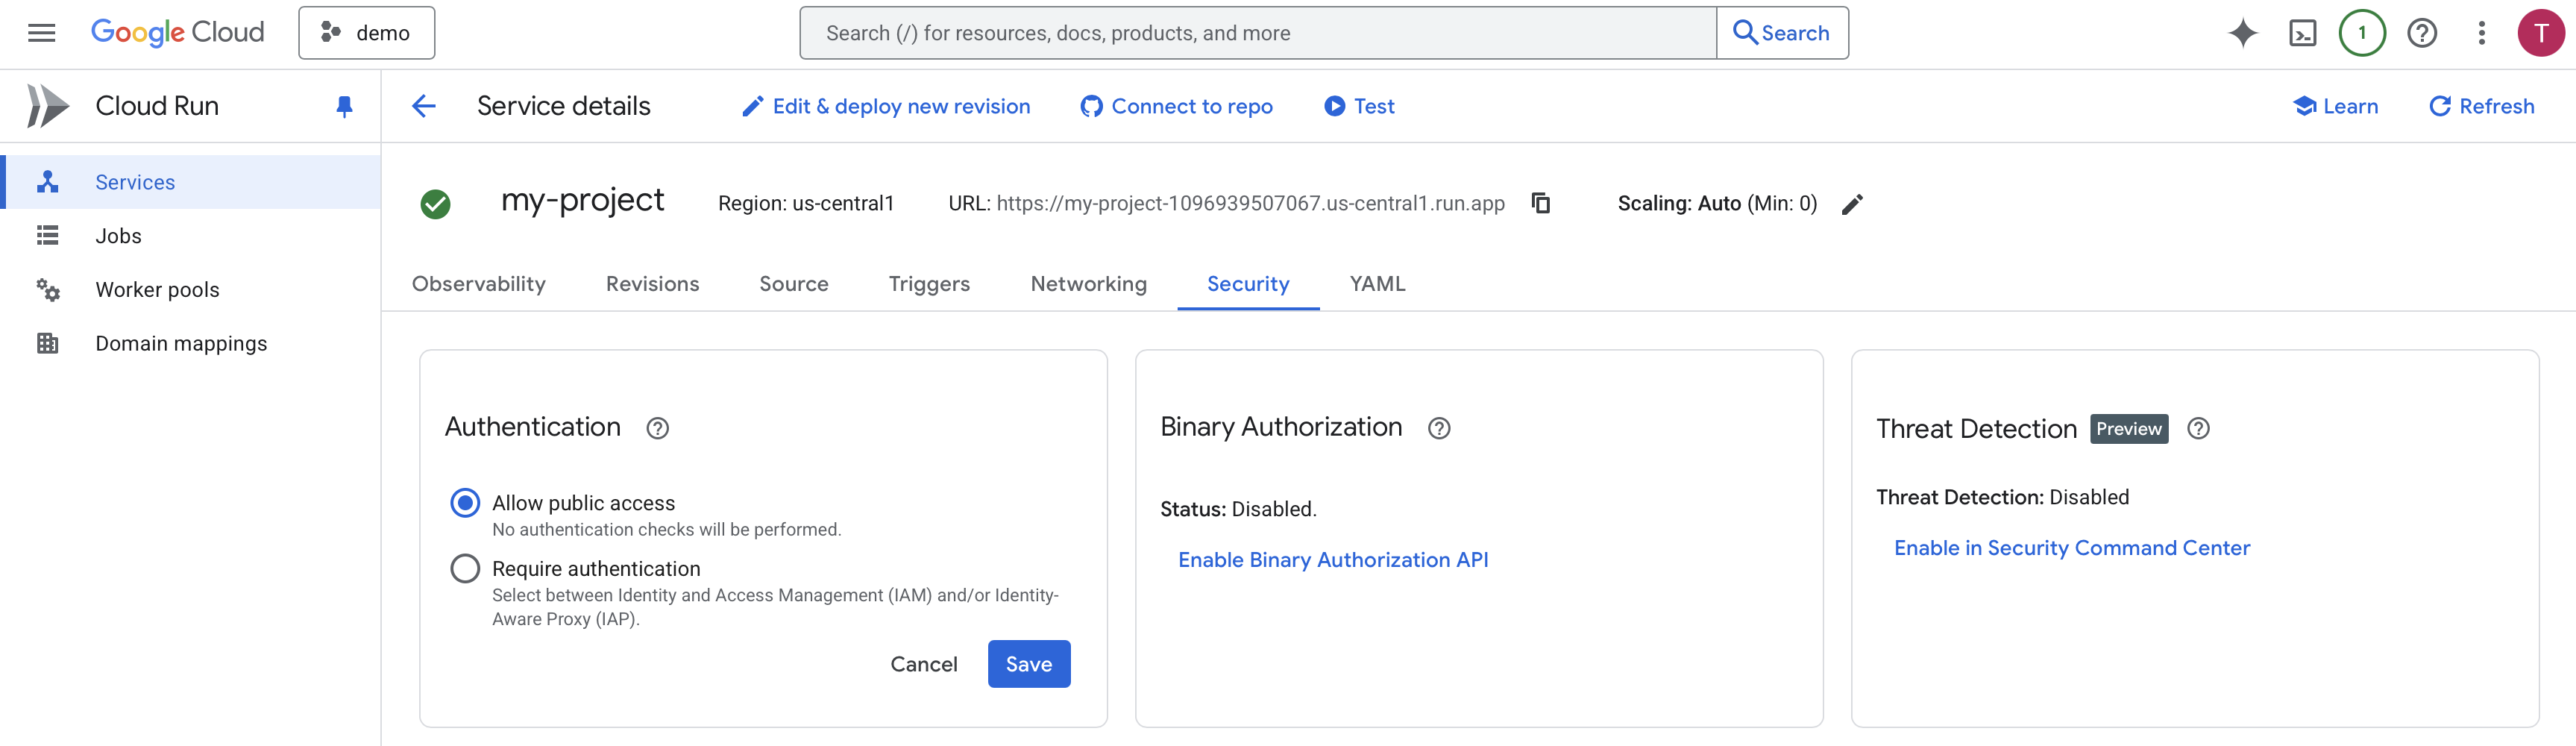
Figure 7:No authentication checks will be performed.
Conclusion and Next Steps
Congratulations! You have successfully run a fullstack AI agent and extended its capabilities with a new, specialized skill. By adding the code_execution_agent, we transformed the system from a qualitative information retrieval tool into a quantitative information analysis tool.
This modular approach is incredibly powerful. For repetitive analytical tasks—like generating a weekly sales report across multiple regions—this agent can provide a massive productivity boost. While we hard-coded the agent’s instructions today, this architecture is the foundation for more advanced systems where the agent could generate analysis plans directly from a user’s natural language request, further democratizing data-driven decision-making.
We encourage you to think about the repetitive, high-value workflows in your own domains. What specialized agents could you build to automate them?